Channel drains are a type of drainage system that can be used for both commercial and residential purposes. ABT Drains offers this service to its customers in order to help them maintain clean environments. They are also commonly used in places where there is frequent rain or snowfall.
A channel drain is a common plumbing fixture that helps to remove water from a drainage system. They come in a variety of shapes and sizes, so it’s important to find the right one for your needs – this read is all about that.
Table of Contents
Recommended
- 6 Common French Drain Mistakes & How to Avoid them
- French Drain: Construction & Guide
- Best Sump Pump For Pool In 2022
What is a Channel Drain?
A Channel drain (also known as a trench drain) is the perfect solution for managing large amounts of water, such as during a flood or storm. It collects runoff from an area and disperses it over a wide area, keeping your property dry and protected.
A trench drain can be found in areas where it is advantageous to move water quickly and cleanly away from land.
Concrete Channel Drain
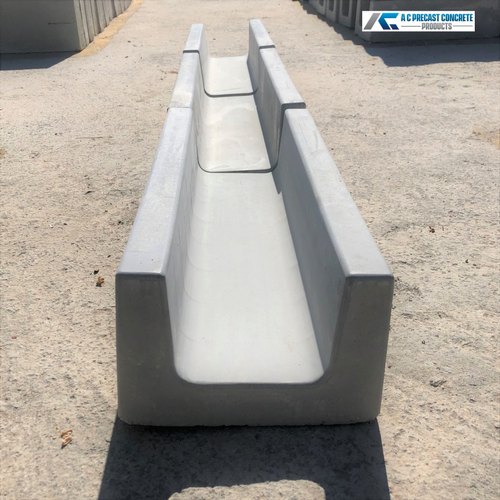
Channel drains are a popular and long-lasting solution for drainage in buildings. They are made from durable materials such as plastic and concrete, so you don’t have to worry about them deteriorating quickly from chemical use or other factors.
Long-Lasting Materials
The materials that make up a channel drain are in large part why the system is long-lasting. When choosing a trench drain, think about the material you’re using as a base. Use concrete if possible to avoid any heat damage or warping.
Trench Channel Drain
When water accumulates on the surface of the ground, it can cause problems like flooding and landslides. Trench channel drains help to remove this water by directing it into a series of trenches that are often situated below the ground’s surface.
Rainy Areas
Trench channel drains are often used in areas that are prone to flooding or landslides. They’re also used in areas that have a lot of rain runoff, such as urban areas and agricultural areas. Trench channel drains help to reduce flooding and landslides by cleaning up the water before it can cause damage.
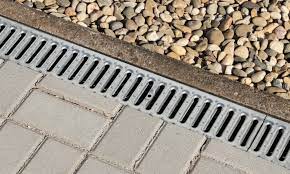
Channel Drain Sidewalk
The best way to address channel drain sidewalk depends on the specific situation. However, some general tips that may help include:
Improving signage and markings – Make it clear to pedestrians and drivers where the sidewalk ends and the roadway begins. This will help reduce channel drain sidewalk by directing traffic in the right direction.
Installing barriers or divider walls – If channel drain sidewalks are causing problems in your area, you may want to consider installing barriers or divider walls to help separate pedestrians from vehicular traffic. This can help to prevent channel drain sidewalk from occurring in the first place.
Encouraging walking – One of the most effective ways to reduce channel drain sidewalk is by encouraging people to walk more often. By doing this, you will reduce the amount of water that flows down the sidewalk and into storm drainage systems.
Channel Drain Installation
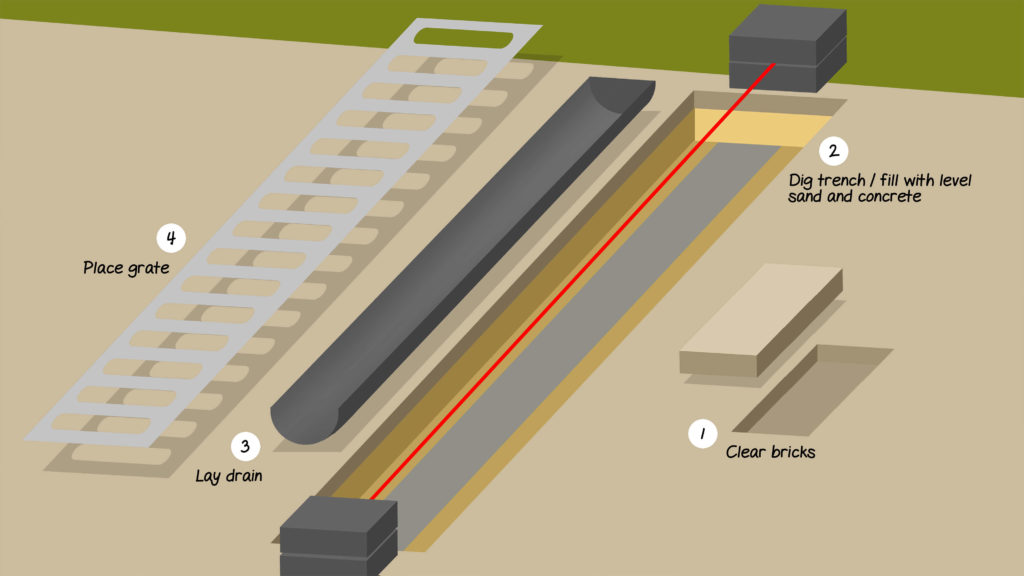
Channel drains are a great long-term solution for managing water and soil, but need to be installed correctly in order to achieve desired results. If you’re interested in installing your own channel drain system, research the options available online or contact a contractor or landscaping company.
There are many types of channel drains, but the installation process is usually similar from product to product as manufacturing are remains the same.
Here are a few things to keep in mind before start digging!
- The most important thing to remember before starting your trench is that you’ll need to ensure the stability of the ground around it. By digging a trench in an unstable area, you could end up damaging your property or even causing yourself serious injury.
- The grading in your landscape needs to be just right for water to flow into the drainage channel and away from your home. A slope of between 1:12 and 1:24 is ideal, but any closer and water can flow backward instead of into the drain.
- To measure slope for landscape drainage, use a flat object like a ruler or a piece of cardboard, and place it at an angle against the ground so that one edge is resting on top.
- If you are using plastic sticks of channel, use concrete as the base to avoid warping or melting.
Channel Drain Garage

Avoid Flooding
A channel drain garage is a great way to increase the efficiency of your home by reducing the amount of water that flows into and out of your home. When rain or snow accumulates on the roof and slides down into the gutters, it can cause water to flow down the channels and flood your home.
Reduce Water
By installing a channel drain garage, you can divert this water into a drainage system that will take it away from your home. This will help to reduce the amount of water that flows into your home and keep it dry.
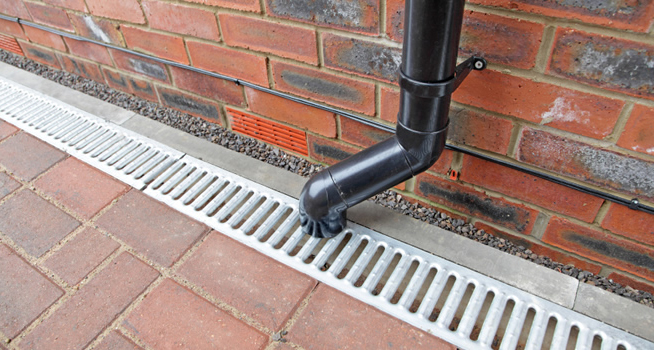
Water channel drain
A water channel drain is a simple and effective way to keep your basement or crawlspace dry and clean. By connecting the drain to a storm sewer, you can ensure that any excess water run-off from your home is quickly and easily disposed of. This prevents moisture build-up and the occurrence of mold or mildew.
Installation
To install a water channel drain, start by measuring the length and width of the opening in your foundation or crawlspace. Next, cut a section of PVC pipe to fit the dimensions, and attach the drain using PVC cement. Make sure to seal the edges of the pipe using a sealant, and then connect the pipe to your storm sewer using an appropriate fitting.
How to install a channel drain
As the installation and configuration of a channel drain will vary depending on the type of drainage system that you have, as well as your specific needs. That being said, some general tips that may be applicable to your situation include:
- Get a professional estimate – Before you start any installation or repair work, it’s always a good idea to get a professional estimate. This will help you avoid any unexpected costs and ensure that the work that you do is done correctly and in a timely manner.
- Clear all obstructions – Once you have obtained your estimate, it’s important to clear all obstructions from the area where the drain is to be installed. This includes removing any furniture or appliances, as well as any debris or soil that may be in the way.
- Disconnect and seal tubing – Once all obstructions have been cleared, it’s time to disconnect and seal any tubing that will be used in the installation process. Make sure to use the correct connectors and sealants, and pay close attention to safety precautions when doing so.
- Install the drainage system – Finally, install the drainage system using proper techniques and tools, making sure to connect all tubing properly and check for leaks occasionally. Once everything is installed, test the system for leaks and adjustments as necessary.
Channel drain patio
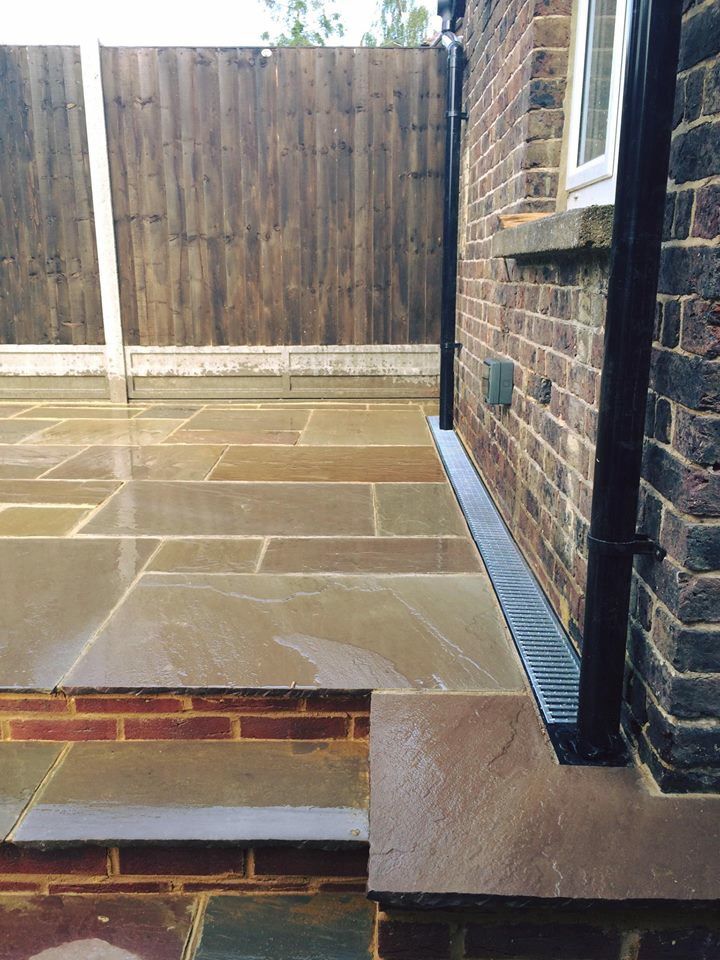
Stylish & Dry
A channel drain patio is a great way to add function and style to your outdoor space while preventing water and debris from entering your home. By installing a channel drain patio, you’ll be able to divert water away from your home and into a storm drain, keeping your property clean and dry.
Additionally, channel drain patios are an excellent way to reduce landscaping maintenance and keep your area looking tidy.
Use Precautions
We hope this guide has been helpful in learning about the different types of trench drain and their uses. Remember to use caution when working with these tools, as improper installation or usage can lead to serious injuries.